For the Want of a Horseshoe Nail: Identifying causes of tile failure
Canary in a coal mine
Lack of movement joints and the subsequent failure of the grout was just the first of many problems plaguing this tile installation. Once intrusive moisture had saturated the mortar, thermal cycling of the tile compromised the adhesive bond between the two. It was clearly evident from examining the failed tiles they had been negatively impacted by insufficient mortar coverage and spot-bonding. With these factors combining with excess moisture in the mortar and temperature swings from season to season, tile failure was likely inevitable (Figure 3).
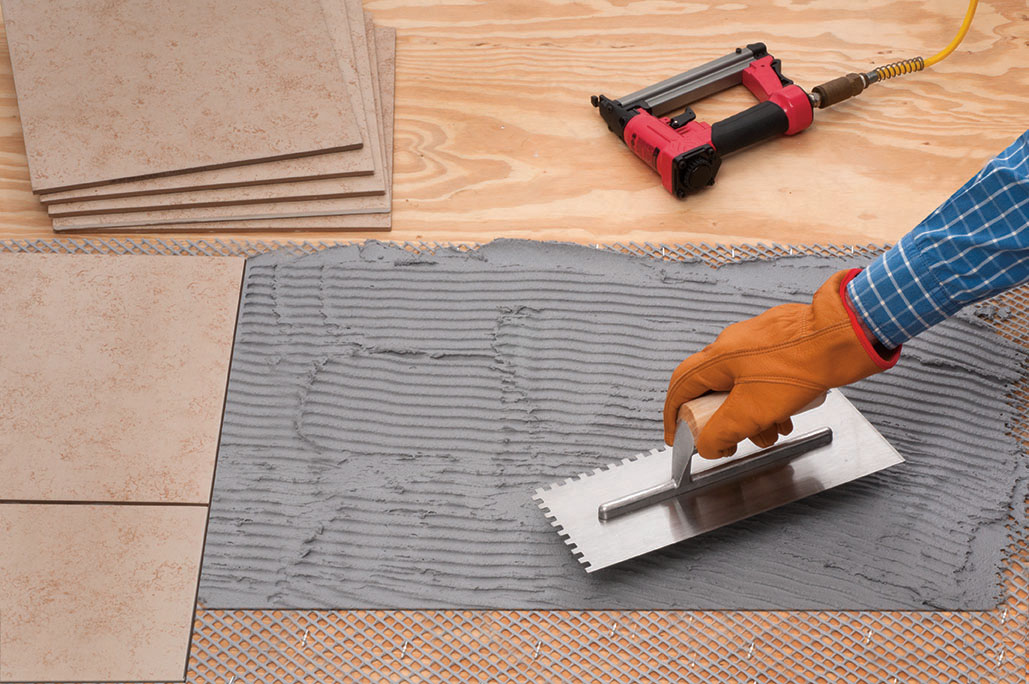
Spot-bonding is not recognized as an acceptable installation method in the tile industry. Despite being quicker and cheaper than uniform directional troweling due to its lower labor and material requirements, this method generally results in inadequate mortar coverage, which can cause tiles to shear away from the mortar or crack from impact. Figure 3 shows approximately 60 to 70 percent mortar coverage and uncollapsed mortar ridges. For exterior installations, the standard is mortar coverage ≥ 95 percent, with all corners of the tile supported.
American National Standards Association (ANSI) A108.5 2.5.4, Installation of Ceramic Tile with Dry-set Portland Cement Mortar or Latex-Portland Cement Mortar, states when 95 percent coverage is specified in the project specifications, it is best to:
Back butter each tile with bond coat; or select a notch trowel sized to facilitate the proper coverage, key in the mortar into the substrate with the flat side of the trowel, and comb with the notched side of the trowel in one direction. Embed the tile in the mortar by beating in, pushing in a direction perpendicular to the combed ridges or other means to achieve the specified coverage. The method used should produce maximum coverage with corners and edges supported. Periodically remove and check a tile to assure that proper coverage is being obtained.
For this particular project, looking at the backs of the loosened tiles was also enlightening, and further emphasized the importance of utilizing the correct methods and materials when setting tiles (Figure 4). If the tile had been correctly back buttered, if the contractor used the right type of mortar, if the mortar had been uniformly combed in sufficient quantity, or if the installer periodically removed a tile during installation to assess mortar coverage and correct accordingly, then might this failure have been avoided?
The tile in Figure 4, if correctly set, would have retained quite visible mortar residues over 95 percent of the tile back with few, if any, uncollapsed mortar ridges. The white residue on the tile’s back is kiln release from the tiles’ manufacture, which can act as a bond breaker. That possibility could have been eliminated if the tile had been thoroughly back buttered (Figure 5).
Mortar coverage revealed
As already discussed, adequate mortar coverage can be ensured when the proper materials and methods are employed, along with periodic inspection of the back side of the tile during installation. A better understanding of tile mortar failure can be gained if one looks behind a tile after installation—something that can be accomplished by installing transparent tiles (i.e. small glass panels) with different mortar application techniques.
Figure 6 illustrates an example of a spot-bonded tile. An attempt to fully embed the tile with completely collapsed mortar ridges is prevented by the thicker spots of mortar, which slightly elevate the tile above the bonding material. This means it is only secured to the substrate with five points of contact, and the gaps and hollows underneath it will lead to cracking or delaminating. The unsupported corners and edges are particularly prone to damage.
The glass tile in Figure 7 was embedded in mortar that was swirl-applied rather than uniformly troweled in one direction. This method also results in uncollapsed mortar ridges and therefore voids under the tile, leading to cracking.
Finally, Figure 8 shows an example of a properly embedded and bonded tile. The mortar was combed in one direction, allowing for near-complete coverage under the tile once it was embedded, with edges and corners completely supported. This tile is less likely to crack from impact or delaminate from shear stresses across the bond line.


Sign up for our weekly newsletter
Architectural materials and methods delivered right to your inbox
- CSI News and Notes: CSI Foundation’s construction camp; CSI spring exam; and more
- CSI News and Notes: CSI’s credentials; CSI conference theme; and more
- To be specific – CSI supports young AECO professionals
- CSI News and Notes: CSI’s foundation scholarships, national conference, and Crosswalk
- CSI News and Notes: AI’s impact; CSI 2024 conference, and more
Read the Latest Issue