The two types of rainscreen wall system design
Today, the term ‘rainscreen’ can mean the façade material, or an entire system consisting of a material fastened to a framework attached to the substrate with a space between the façade and the substrate, as well as other components such as the air barrier, a mesh drainage plane, flashing, and insulation.
Rainscreen has also been used by manufacturers as a name for a single component of a rainscreen wall system, and this interchangeable use of rainscreen to mean the veneer material only, an entire wall system, or a single component has led to confusion over what the term really means. In this article, rainscreen only refers to the external veneer and never to indicate individual components of the wall other than the veneer. ‘Rainscreen wall system’ means the entire wall with all of its components designed according to the rainscreen principle. Individual components, such as drainage plane or air barrier, will be called by their proper names only.
Rainscreen components
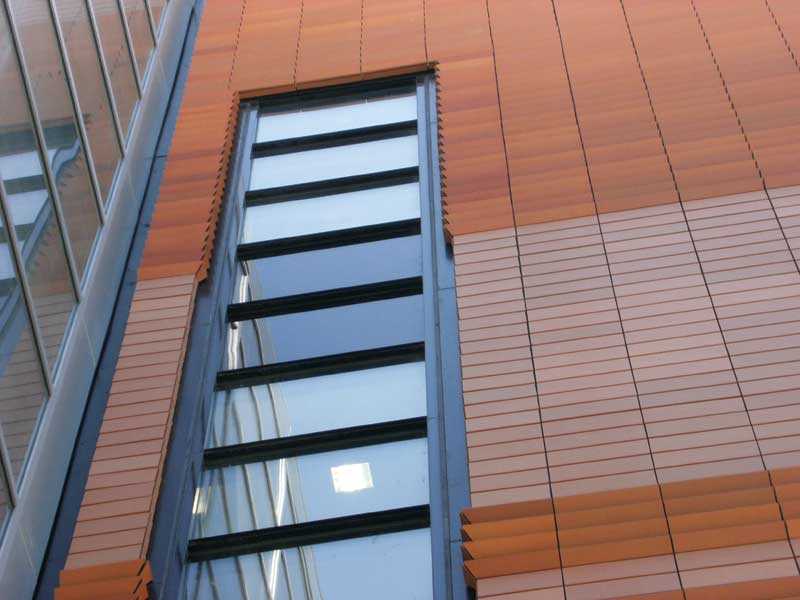
The rainscreen for commercial buildings consists of individual panels made of terra cotta, precast concrete, composite, metal, glass, or thin stone panels. These panels are available in a wide variety of sizes, colors, and textures. In light commercial and residential buildings, the rainscreen may also be wood, vinyl, or cement siding.
Joints between the individual rainscreen panels can be installed with gasket-sealed, material-to-material horizontal and vertical joints, or with open material-to-material horizontal and vertical joints. Open joints often have a semi-sealed 3D mesh with backer material placed against the back of the façade that allows air and vapor to access the airgap.
When discussing open joints in rainscreen wall systems, the author is not referring to a 9.5-mm (3/8-in.) wide head or bed joint that is typical of weep holes in masonry cavity walls. The reference is instead to a much smaller joint configurable in multiple ways. A common joint type is a slightly open, material-to-material shiplap joint. It can be installed horizontally or vertically, and is configured so an upper or vertical unit fits over a lower or adjacent unit in a shingle fashion to prevent the passage of wind-driven rain into the airgap behind the veneer, while allowing air to move between the panels and into the gap. This configuration also prevents the rainwater running down the building from getting behind the veneer.
With a properly designed and installed shiplap joint, water does not find its way back up the wall through the joint and into the wall. Some metal panel manufacturers use a variation on the shiplap joint with multiple bends and overlaps to prevent air pressure and capillary action from forcing water between the panels and into the airgap. If the veneer panels are very close together, capillary action can draw water through the joint and into the cavity, so it is important to choose joint configurations engineered to prevent it. It is advisable to keep in mind the expansion/contraction characteristics of the veneer panels and the effects of wind loads to be sure capillary action will not become an issue as the panels move and the space between the panels’ changes.
Additional components of the rainscreen wall system include an air and water vapor barrier acting as the second and final line of defense between the substrate and moisture in the airgap. This barrier can be sheet or liquid applied, an insulation system with taped or liquid-sealed joints also serving as an air barrier, or a gypsum-based sheathing with integrated air and water barrier and sealed seams. This barrier prevents liquid water from penetrating the substrate, but allows water vapor to pass through so the substrate can dry. Air barriers must be durable and rigid so deflection, or ‘pumping,’ does not occur during wind loads. This pumping action can create negative pressures that draw water into the cavity and can force it through gaps in the air/water barrier into the substrate.
Flashing the rainscreen wall should follow standard flashing details. Flashing around all wall penetrations and at the base of the wall must be included and precisely detailed. Since leaks around windows and doors are the most frequent cause of water damage in most building types, it is important to specify and install end dams above all wall openings to prevent water from running down the sides of windows and doors. One-piece, pre-molded dams are recommended over the field-fabricated ones because of their consistent quality.
Sign up for our weekly newsletter
Architectural materials and methods delivered right to your inbox
- CSI News & Notes: CSI’s impact earns official recognition; celebrate leaders, mentors, and innovators; and more
- CSI News and Notes: CSI spring certification exams open; scholarships available; and more
- CSI News & Notes: CSI MSR heading to San Diego; spring certification exams open; and more
- To Be Specific: Why CDT Should Be Your First Move
- CSI News & Notes: CSI Fellows share member benefits; and a New Year’s Resolution to keep
Related Products

Read the Latest Issue