Understanding challenges with adhered masonry veneer


Drainage mats
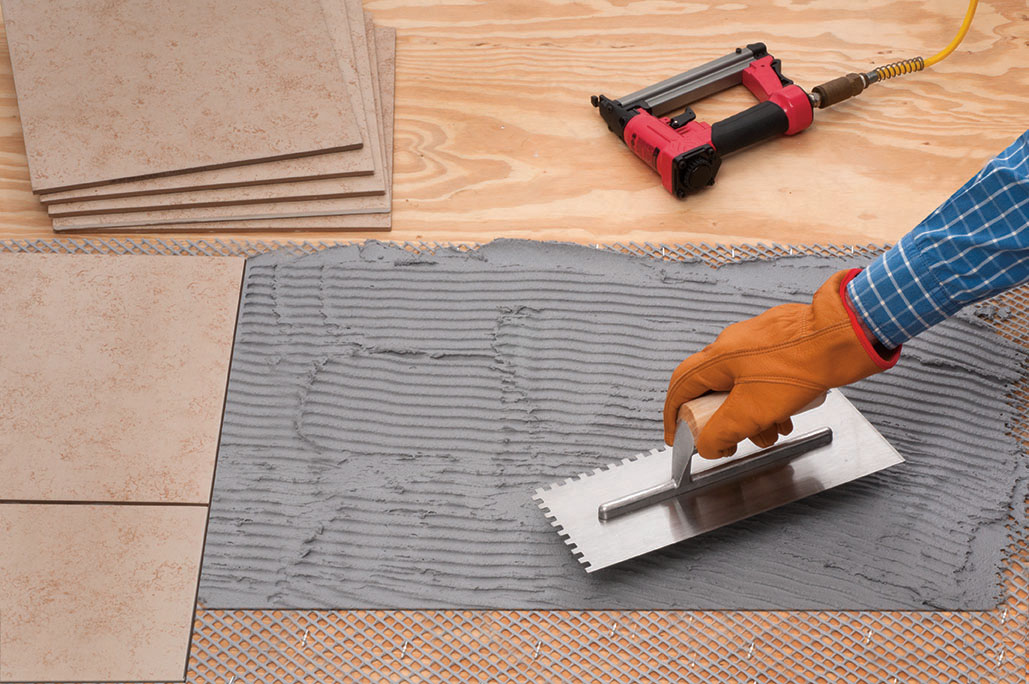
Drainage mats work well to prescriptively create code-compliant adhered masonry veneer systems that have the ability to drain and dry. This is especially critical when designing with absorptive cladding products over wood frame walls with wood-based sheathing.
When using drainage mats, some designers prefer to have a layer of sheathing over the drainage mat, such as exterior-rated cement board to provide a more rigid substrate for the cladding and a solid surface on which the protrusions of the self-furring metal lath sit. Self-furring lath is important, as it creates a 6-mm (¼-in.) space behind the lath so the scratch coat can properly encapsulate the metal lath for adequate bond strength and to protect the metal lath from premature corrosion.
When sheathing is not installed over drainage mats, a rigid or semi-rigid drainage mat with a fabric filter facing the scratch coat should be used to keep mortar from encroaching the drainage plane while also increasing chances for the mortar scratch coat to get behind the metal lath. Many installers have reported positive experience with 9.5-mm (3⁄8-in.) thick, fluted polymer sheeting drainage mats with bonded filter fabric.
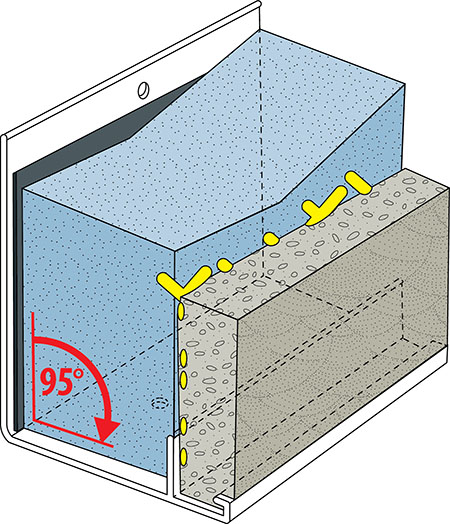
Drainage mat sheets should be installed tight to one another, with filter fabric lapped, so the mortar scratch coat cannot squeeze between the sheets and form an obstruction to the downward flow of moisture and the movement of air. To complete the drainage wall concept, a moisture and air barrier, corrosion-resistant flashing (especially above openings and at top-of-wall details), and weep screeds should be installed before the drainage mat (Figure 9).
Dry-stack veneer applications
One of the attributes of adhered masonry veneer systems is the ability to achieve a dry-stack masonry aesthetic. This installation type should be carefully considered in wet and harsh climates with many freeze-thaw cycles. When using dry-stack cladding applications, it is crucial to create stout water and air management layers behind the cladding and use mortar additives or proprietary setting material that can resist the stresses associated with direct exposure.
When using dry-stack applications in wet climates, other tips include:
- specifying durable cladding products that can withstand exposure at unit edges;
- inspecting the installation process for complete mortar coverage on the back of veneer units so moisture cannot congregate behind the cladding (Figure 10); and
- instructing the masons to install extra setting material around the perimeter of the veneer units so mortar can squeeze out between them (Figure 11).
In all adhered masonry veneer systems, it is important to fully cover the back side of cladding units with mortar to ensure bond strength and not allow water to get trapped behind the cladding. This is especially critical when installing dry-stack adhered veneers. The new ASTM C1242-15, Section 6.7, includes a definition of acceptable full-mortar coverage on the back of cladding units. It is a good standard to use for all types of adhered veneer.
Sign up for our weekly newsletter
Architectural materials and methods delivered right to your inbox
- CSI News and Notes: CSI Foundation’s construction camp; CSI spring exam; and more
- CSI News and Notes: CSI’s credentials; CSI conference theme; and more
- To be specific – CSI supports young AECO professionals
- CSI News and Notes: CSI’s foundation scholarships, national conference, and Crosswalk
- CSI News and Notes: AI’s impact; CSI 2024 conference, and more
Read the Latest Issue