Tile and stone lippage: What is acceptable (and how do you specify it?)

This article was originally published in August 2015 by Donato Pompo. It has been refreshed and updated to further expand on the subject, including updates in industry standards and codes related to tile lippage. The update also reflects the author’s ongoing experience and recommendations since its original publication.
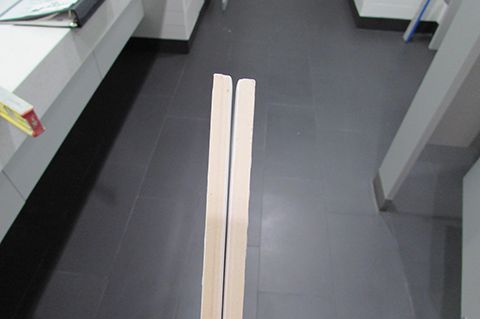
Lippage is the vertical displacement between two adjacent tile edges of an installed ceramic, glass, concrete, or stone tile. When excessive, this can lead to numerous problems, ranging from chipped tile edges to annoying sounds from running vacuums and wheelchairs over the tile edges, to safety hazards such as causing tripping whether someone has physical limitations or not.
There are industry standards for determining whether the amount of lippage is acceptable or excessive, specifically for tiles manufactured in accordance with ANSI A137.1 or ANSI A137.3. American National Standards Institute (ANSI) A108.02-2023, General Requirements: Workmanship for Tile Installation, Section 4.4 (“Lippage−Guidelines, Explanation, and Caution”) deals with what is allowable ceramic tile lippage and how to avoid excessive lippage. It states for grout joints that are less than 3 mm (0.125 in.) to less than 6 mm (0.25 in.) wide, the allowable lippage is 1 mm (0.03125 in.), plus the inherent tile warpage. For grout joints 6 mm (0.25 in.) or wider, the allowable lippage is 2 mm (0.0625 in.), plus the allowable warpage. For gauged-porcelain tile/panels/slabs with any size grout joint width, the allowable lippage is limited to 1 mm (0.03125 in.) with no additional lippage value added because these tile panels do not have warpage. On the other hand, in the 2022 edition of National Stone Institute’s (NSI’s) Dimension Stone Design Manual (p. 13-6 “Horizontal Surfaces,” Section 1.7−Lippage references Chapter 22, p. 22-7 Lippage Tolerances; p. 21-20 Diagnostics; Section 5.5.2 Lippage Tolerances) simply says lippage should be limited to 1 mm (0.03125 in.) for natural stone tile installations. There are exceptions for ungauged or hand molded tiles that are intended to have excessive tile lippage as an inherent characteristic of the tile.
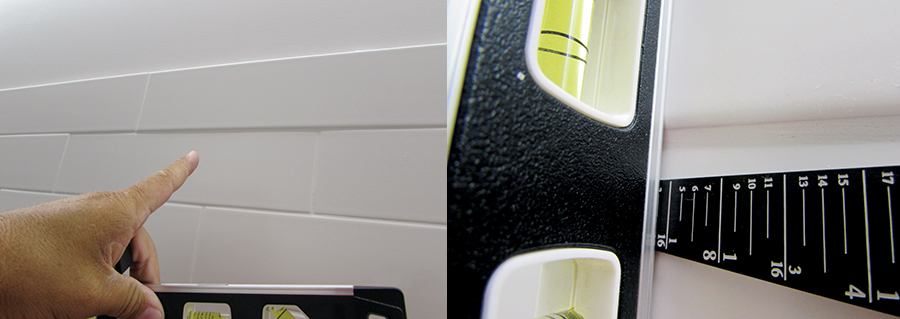
The challenge in trying to minimize tile lippage has to do with numerous compounding conditions, including the substrate’s flatness, which can have significant effect particularly when one is adhering directly to a concrete slab. Per ANSI A108.02-2023 Section 4.2.1 and 4.2.2, the substrate needs to be prepared before the tile installation such that the maximum allowable variation from the required plane for tiles with all edges shorter than 380 mm (15 in.) is no more than 6 mm in 3 m (0.25 in. in 10 ft), and no more than 1.6 mm in 0.3 m (0.0625 in. in 1 ft).
For tiles with at least one edge 380 mm (15 in.) or longer, the maximum allowable variation from the required plane is not more than 3 mm in 3 m (0.125 in. in 10 ft), and no more than 1.6 mm in 0.6 mm (0.0625 in. in 2 ft). If the substrate is too irregular, then it is difficult for the installer to compensate for the irregular surfaces and install the tile in a manner to minimize lippage.

Dry-set mortar for large and heavy tile
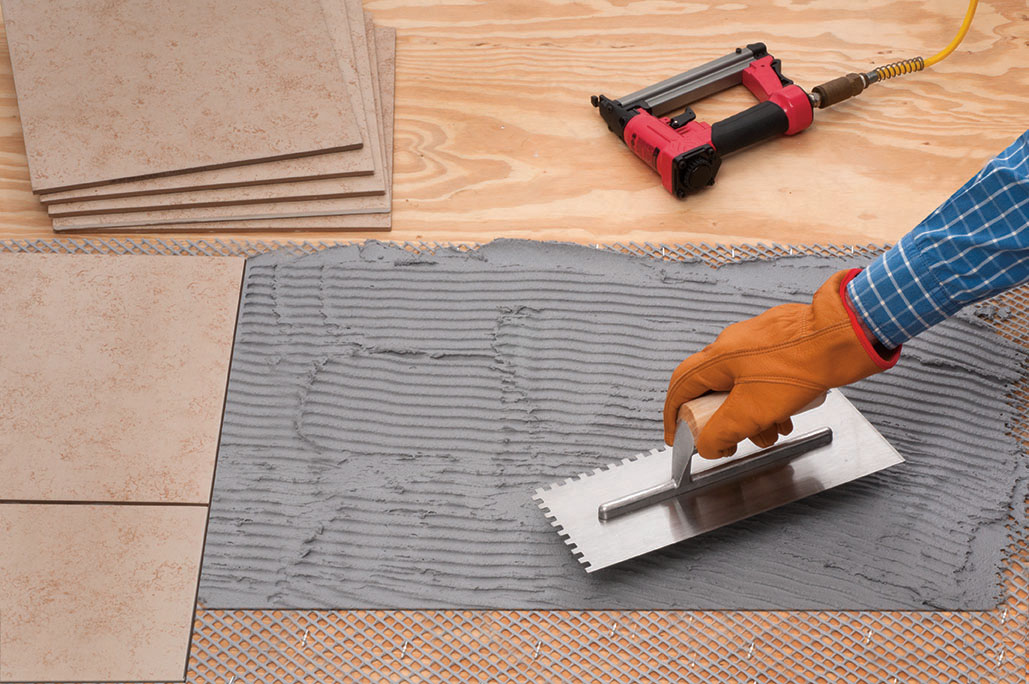
There is an erroneous belief among some tile-installers and specifiers who think using adhesive mortars for large and heavy tiles—which can be applied as thick as 12.7 mm (0.5 in.)—is designed to compensate for substrates excessively out-of-plane. Industry standards for thin-set mortar adhesives, such as Section 2.1 of ANSI A118.4-2023, Standard Specifications for Modified Dry-set Cement Mortar, says dry-set mortars are designed as direct-bond adhesives. They are not intended to be used in truing or leveling underlying substrates or the work of others. (Due to this common misunderstanding, the industry eliminated the name “medium-bed” mortar.)
Substrates need to be prepared before adhering tiles. High spots on concrete slabs must be ground down and low spots filled with special patching mortars or cementitious self-leveling mortars to achieve the appropriate intended flatness or slope. Dry-set mortars for Large and Heavy Tile (LHT) are only meant to be used for large and heavy tiles so they do not sink into the thin-set mortar during the installation; they can also be used to compensate for ungauged tiles that vary in thickness from each other within reason.

Tile warpage
Another compounding factor contributing to excessive lippage is the degree of tile warpage. Many modern tiles are much larger than before; particularly those rectangle shapes whose long-to-short-side ratios can be extreme. This means warpage can cause unavoidable lippage or as discussed later in this article, the perception of such a condition.
It is important to remember that all ceramic tiles have some degree of warpage. However, just as with natural stone, it is these irregularities that give the materials their character and desirable appearance. Ceramic tiles have always had warpage and other dimensional variations, although current production technology results in more consistency. ANSI A137.1, Specifications for Ceramic Tile, has established allowable tolerances criteria for each type or category of ceramic tile.
While porcelain ceramic tiles are much denser and are more controllable in their manufacturing, they still have warpage. Standard-calibrated porcelain tiles have tolerance requirements allowing more variation in warpage and sizing dimensions. Rectified porcelain ceramic tiles have been ground after their manufacturing, so their dimensional tolerance variations are much more limited. This allows the tile to be installed with a narrower grout joint width. Some manufacturers will say the grout joint can be as narrow as 2 mm (0.0625 in.), but this author never recommends less than 4 mm (0.125 in.).
A 2-mm wide grout joint is too narrow to adequately fill the full depth of the grout joint for maximum support of the tile edge, which can result in grout later coming loose. Additionally, this grout joint would not be wide enough to allow for adjustments during the installation to help compensate for dimensional tile variations or minimize potential for tile lippage.
The more dimension variation a tile has, the wider the grout joint should be to keep grout joints looking consistently straight and to minimize potential tile lippage. This is why one sees grout joints on irregular-sized Mexican paver tiles that are 20 mm (0.75 in.) or wider, which helps compensate for the wide variations in their dimensional sizes.
Grout joint widths
Both ANSI and NSI state grout joints can never be less than 2 mm (0.0625 in.) wide. This author often sees where tiles are butted together, which can lead to some serious problems. One potential problem is tile edge chatter where edges chip because the tiles compress against each other. This is caused by normal expansion within the tiles due to moisture or temperature fluctuations or from dynamic building structural movements.
Another potential problem with tiles butted up to each other, particularly when there are not adequate movement joints installed within the assembly to mitigate tile movements, is that the tile can become debonded and tent up from the compression stresses caused by the tile expanding while being constrained. This is particularly true when they are not bonded well to their substrate and the tile is butted up to restraining surfaces at perimeters.
Tile patterns
Warpage generally occurs at the tile’s corners or at its center. For this reason, ANSI A108.02 says for running-bond patterns (i.e. staggered or offset) using tiles where any side is greater than 380 mm (15 in.), the grout joint size must be an average of at least 3.2 mm (0.125 in.) wide for rectified tiles, and a minimum of 4.8 mm (0.1875 in.) for calibrated tiles.
The grout joint width shall be increased over the minimum requirement by the amount of edge warpage on the longest edge of the tiles being installed. For example, for a rectified tile exhibiting 1-mm (0.03125 in.) edge warpage on the longest edge, the minimum grout joint width will be 4 mm (0.125 in.) + 1 mm (0.03125 in.), or 5 mm (0.15625 in.) for running bond tile patterns. Again, the wider the grout joint, the more one can minimize tile irregularities and minimize lippage. On the other hand, the narrower the grout joint, the less one can compensate for irregularities within the tile or its substrate.
Warpage concentration limitations
Currently, ANSI A137.1 does not limit how much warpage can be concentrated within certain spans of the tile. This can be problematic because the tile might not exceed the maximum allowable warpage, but its warpage could be concentrated at the tile’s corner or center—for which the tile installer cannot fully compensate. For this reason, the ANSI committee is currently considering adding language to the standards to limit the warpage concentration.
Staggered tile pattern limitations
Since tile warpage can be so much more problematic with tiles installed in a running-bond pattern, there are other limitations stated in ANSI A108.02-2023, Section 4.5.2. This particular standard covers the compounding effects of the warpage from two adjacent tiles. It states tiles being installed in a running bond where the side being offset is longer than 380 mm (15 in.), the running bond offset cannot exceed 33 percent of the tile length, unless otherwise specified by the manufacturer. Mockups should always be required for approval before the tile installation to ensure end-users understand what they are getting—and to avoid false expectations.
Square versus chamfered edges
Another compounding factor that can contribute to excessive lippage is whether the tile being installed has a sharp square edge or an arris with a slight chamfer edge. The former is more prone to showing lippage and other variations, while the latter will be more forgiving. The chamfered edge will make the grout joint width wider at the tile surface.
Calculating allowable tile lippage
At the beginning of this article, the author stated allowable lippage is either 1 or 2 mm (0.03125 or 0.0625 in.), depending on the tile and the width of the grout joint, in addition to the inherent warpage of the tile manufactured in accordance with ANSI A137.1 or A137.3 for ceramic tile gauged porcelain tile/panels respectively. Tile Council of North America (TCNA) interprets this in its 2025 Handbook for Ceramic, Glass, and Stone Tile Installation as meaning the inherent warpage of a particular tile is the actual warpage the specific tile has when installed.
Some people incorrectly interpret this to mean they can take the maximum allowable warpage stated in ANSI A137.1 and add it to the respective allowable lippage value. However, this author believes the calculated lippage would be unreasonable and excessive from a standard-of-care point of view for professional tile installations.
Installation methods
The tile installation method can help limit lippage or contribute to its excessiveness. Adhering the tile directly to the substrate, particularly when it has not been properly prepared to meet the industry requirements for flatness, can make it difficult to avoid lippage. On the other hand, installing tile in a fresh dry-pack mortar bed while it is still in a plastic stage can help compensate for dimensional variations because the installer can embed it into the fresh mortar.
Another contributing factor is the skill and craftsmanship by the tile installer. When workers are not sufficiently experienced, skilled, or detail-minded, their poor workmanship can cause or contribute to excessive tile lippage. It is important qualified, skilled installers who understand current industry standards are used for tile and stone installations to help ensure successful installations.
Unavoidable lippage at drains
There are some applications where tile lippage to some degree is unavoidable. ANSI A108.02-2023 Section 4.4 cautions the lippage requirements do not apply to tiled floors sloping to drains specifically when using tiles 15 x 15 mm (6 x 6 in.) and larger. The larger the tile surface area, the greater the potential for tile lippage under these conditions. This is why one often sees tiles cut in half at a diagonal near drains with sudden changes in slope. However, this does not mean the installer can have extreme tile lippage—it still needs to be reasonable considering the conditions.
Using relatively new trench or linear drains for tile installations can be a good solution to avoid this problem. The trench or lineal drains can be installed at the perimeters of decks or showers. The trench drains can be installed so the tile surface has a uniform slope to the drain avoiding lippage at the drain.
Perception is reality?
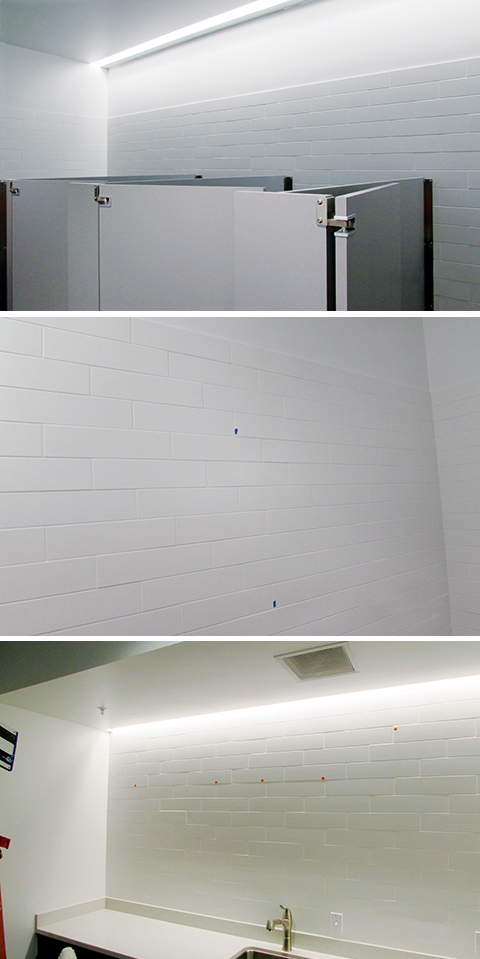
Sometimes, excessive tile lippage is perceived by end-users despite everything being within allowable standard tolerances. The culprit is lighting. Even the best of tile installations can look awry when the light is shining on the surface at a certain angle relative to the angle from which it is being viewed.
This is more problematic with large, rectangular tiles with narrow grout joints installed on walls, particularly in a staggered pattern. At certain angles and in the right sunlight, some tile exterior veneers look like there are built-in handholds to climb up the wall, despite lippage actually being within tolerance.
This is because lighting causes shadowing at the grout joint, creating an optical illusion. (This can also occur in interior applications with daylighting or electrical systems.) TCNA’s Handbook for Ceramic, Glass, and Stone Tile Installation warns use of wall-washer and cover-type lighting—where lights are located either at the wall/ceiling interface or mounted directly on the wall—may produce shadows and undesirable effects with tiles.
Similar shadows are created from side-lighting interior walls and floors when light shines from an angle through windows and doors. This author has investigated many commercial and residential projects where there were complaints of alleged excessive tile lippage only to find out during the inspection it was reasonable and within allowable industry tolerances. Of course, there have been numerous other cases where there actually was excessive lippage because the contributing factors listed throughout this article were not properly managed.
Tile leveling systems to help avoid tile lippage
Besides all of the above referenced conditions that can contribute to excessive tile lippage, in recent years Tile Leveling Systems have become available as a tool to use to prevent or limit tile lippage. These are plastic bases that fit under the tile at the tile edges available in different grout joint widths. A cap or wedge is used over the plastic base protruding out of the grout joint to tighten down on the two adjacent tile edges; thus pushing the high side down and pulling up the lower side to a level position. It can work well, but if there is not enough thinset used or if there is too much tile lippage it can pull the tile up too far and affect its bond.
Specifying and MasterFormat
How can architects help avoid excessive tile lippage (or perceptions thereof) on their projects? It is the same old answer: write a project-specific, detailed MasterFormat specification that is complete, concise, correct, and clear. In the specification, it is not only important to specify the appropriate reference standards in Part 1–General and the correct products with Quality Assurance performance requirements in Part 2–Products, but it is also critical to specify the key steps of the installation in Part 3–Execution to include a Quality Control (QC) plan.
It does not matter who is at fault when there is a problem—everyone ends up paying, either in time to defend themselves, money to fix the issue, or with their reputation. Therefore, it is in everyone’s best interest to ensure installation specifications are thorough and clear, as well
as unambiguous. The following paragraphs summarize the key content that should be in specifications for tile and stone installations to avoid excessive tile lippage.
Part 1–General requirements
1. The key industry standards must be called out:
- ANSI A108 for surface preparation and the installation of stone, glass, and ceramic tile;
- TCNA Handbook for Ceramic, Glass, and Stone Tile Installation for specifying specific installation methods;
- Natural Stone Institute (NSI) Dimension Stone Design Manual for adhered and mechanical anchored applications;
- ASTM C1242, Standard Guide for Selection, Design, and Installation of Dimension Stone Attachment Systems, and ASTM Stone Physical Property Standards for the respective geological classification of the stone being used;
- ANSI A137.1 and A137.3, American National Standard Specification for Ceramic Tile; and
- ANSI A137.2, American National Standard Specification for Glass Tile.
2. A specific quality assurance (QA) section needs to be prepared to verify performance of a material or system to verify that it will be suitable for the intended application.
3. A required mockup should become the standard upon approval for installation methods and for workmanship for performance and aesthetic quality. It should include the specified lighting to which the tile will be subjected. The mockup can become part of the work upon approval.
4. Single-source responsibility from an installation product manufacturer should be required, and include a minimum 10-year labor and material manufacturer warranty. The quality of the products required for the extended warranty tends to be much higher; it also ensures compatibility between the materials. It is also important to require a letter in writing from the manufacturer, before installation, stating its products are suitable for the intended application.
5. Tile-installers—both setters and helpers—should be certified or verified to demonstrate they know and are current with industry thin-set standards (e.g. Certified Ceramic Tile Installers [CTI] through the Ceramic Tile Education Foundation [CTEF] and Tile Installer Thin-set Standards [ITS] verification through the University of Ceramic Tile and Stone [UofCTS]).
Part 2–Products
1. The specifications should be performance-based. Reference specifications only call out products meeting the minimum requirements, which are essentially the least-expensive products with the lowest acceptable level of performance.
2. Stone should meet ASTM minimum/maximum physical property requirements for their respective geological classification. Ceramic tile should meet ANSI A137.1 or A137.3 standards, and glass tile should meet ANSI A137.2, Specification for Glass Tile. If narrower grout joints are desired, one should specify rectified tiles to meet the respective ANSI A137.1 tolerances.
3. To avoid excessive concentrated tile warpage, one should require one-tenth the length of the measured span of the tile to not represent more than 25 percent of its total allowable warpage.
4. Installation products should be provided by a single-source manufacturer who offers a minimum 10-year labor and material warranty. Thin-set adhesives should meet or exceed ANSI A118.15 for higher performance. Further, an appropriate cementitious, urethane, or epoxy grout—part of the labor and material warranty—should be called out.
5. A cementitious self-leveling mortar or patching mortar, if not a full mortar bed application, as supplied by the single-source manufacturer of tile installation products, should be called out for adjusting the substrate before tile installation.
6. An appropriate movement joint sealant and backup strip—per ASTM C920, Standard Specification for Elastomeric Joint Sealants—should be listed as being supplied by the single-source manufacturer of tile installation products.
Part 3–Execution
1. The specific installation method and detail from TCNA Handbook for Ceramic, Glass, and Stone Tile Installation must be specified. Direct-bond applications normally require adjustments to the substrate to make it flat enough. Mortar-bed applications should be able to correct irregular substrates.
2. In Division 03 00 00–Concrete, it must be noted substrates are to meet ANSI A108.01 tolerances and surface textures in preparation for tilework. Normally, the tile installer will still have to make additional surface preparations.
3. In Division 26 50 00–Lighting, it should be noted fixtures must be placed in a manner to avoid direct lighting on tile wall surfaces.
4. Installers must be required to inspect substrate conditions before commencing with the installation. When there are any obvious defects or conditions preventing a satisfactory tile installation, the installer is to notify (per ANSI A108.02) the architect, general contractor, or other designated authority in writing; he or she is not to proceed until satisfactory conditions are provided.
5. The tile contractor should be required to provide an allowance for preparing direct bond substrates to meet ANSI A108.02 Section 4.0 (“General Requirements”), which will allow them to achieve a proper, flat tile installation without excessive tile lippage. This may require grinding high spots on concrete surfaces or applying a self-leveling or patching mortar to make the surface reasonably flat within the specified plane. It normally requires scarifying concrete surfaces to open up pores and removing contaminates.
6. Tile and installation products must be installed per manufacturers’ instructions and industry standards. Products should be mixed per manufacturers’ instructions. Temperature limitations must not be exceeded, and shading or heat must be given as required. Further, work must be protected from both weather and other trades.
7. Tile installed in a staggered pattern must be offset no more than one-third if any edge of the tile is greater than 457 mm (18 in.).
8. The width of the grout joint should be specified per ANSI A108.02 Section 4.5, with maximum allowable lippage stated per Section 4.4.
9. Movement joint placements should be specified per TCNA EJ171 within the field of tile, at their perimeters, and at transitions in plane or to other materials. The architect must provide movement joint design and layout instructions for the tile-installer.
10. The architect needs to provide a detailed quality control (QC) plan, to be implemented by a qualified third party. Key steps of the QC plan are to verify the:
- tile substrate is properly prepared;
- tile meets the specification requirements;
- specified installation method and procedures are being correctly followed;
- tile installation products are being correctly stored and used; and
- tile installer workmanship is kept consistent with the approved mockup.
Sign up for our weekly newsletter
Architectural materials and methods delivered right to your inbox
- CSI News & Notes: CSI’s impact earns official recognition; celebrate leaders, mentors, and innovators; and more
- CSI News and Notes: CSI spring certification exams open; scholarships available; and more
- CSI News & Notes: CSI MSR heading to San Diego; spring certification exams open; and more
- To Be Specific: Why CDT Should Be Your First Move
- CSI News & Notes: CSI Fellows share member benefits; and a New Year’s Resolution to keep

Read the Latest Issue