Window replacement detailing in historic buildings
Windows are an essential component of historic building facades. They define both the building’s exterior character and the relationship between occupants and the outside world.
Eventually, a replacement project becomes necessary when the windows no longer perform their core functions. They may be leaking water, thermally inefficient, or too drafty for comfort.
When windows are replaced, owners often seek to preserve the building’s original appearance while achieving modern performance. Designers and builders face the challenge of installing contemporary window systems into wall assemblies that may be decades—if not centuries—old.
Despite the age and variability of surrounding construction, replacement windows are expected to integrate with these walls and provide a seamless facade.
This article examines best practices and lessons learned for specifying and installing replacement windows in historic buildings. It starts with early design and high-level decisions, then progresses to granular detailing during construction. Although the focus is on punched-window replacements in historic buildings, the concepts and detailing strategies apply to many types of fenestrations and to existing construction in general.

Establishing aesthetic and performance goals and requirements
When planning a window replacement project, especially in a historic building, it is essential to begin with clear aesthetic and performance goals. Windows are primary visual elements that define a facade’s character while also playing a major role in energy performance, occupant comfort, and long-term maintenance budgets. A successful project balances historic appearance with modern thermal, airtightness, and operational requirements. Start by defining the project’s priorities: which visual features must be preserved, required thermal or acoustic performance, operational improvement expectations, and which constraints—budget, schedule, and maintenance capacity—will shape the final decisions.
Hazardous materials assessment
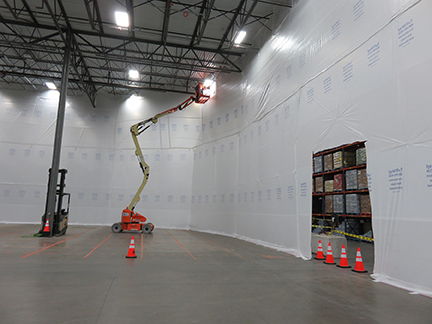
Before any window removal or refurbishment begins, it is critical to evaluate existing sealants and coatings for hazardous materials. Sealants used in historic windows, particularly those installed before the late 1970s, can contain asbestos, and older paint systems often contain lead. Disturbing these materials during demolition, surface preparation, or installation poses health risks to workers and occupants and can trigger regulatory requirements. Testing should be performed early in design to inform specifications, contractor means and methods, abatement scope, and project cost and schedule. Proactively addressing hazardous materials helps avoid delays, ensures compliance with safety regulations, and allows window replacement work to proceed without compromising worker safety or historic fabric.
Researching historic landmark and code requirements
Historic preservation guidelines and local building codes often set different, sometimes competing, requirements. Thorough research into applicable landmark commission standards and energy codes is the first technical task. Identify which elements of the existing windows contribute to the building’s historic character—sightlines, muntin patterns, profile depths, and stile and rail proportions—and determine whether the reviewing authority protected or favorably recommends those elements. While most historic buildings will be subject to review by a state, county, or local historical preservation commission, some buildings are listed on the U.S. National Register of Historic Places and are therefore subject to prescriptive and often more stringent standards defined in The Secretary of the Interior’s Standards for Rehabilitation as administered by the National Park Service (NPS).
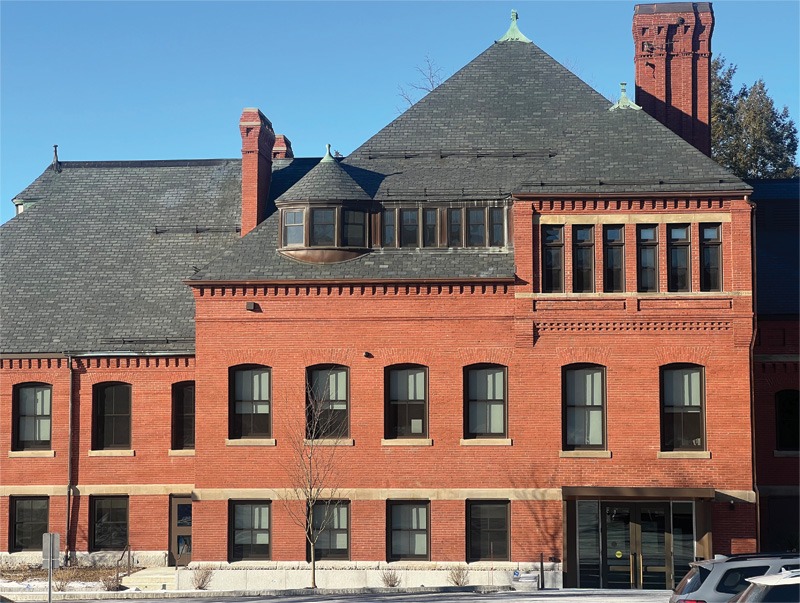
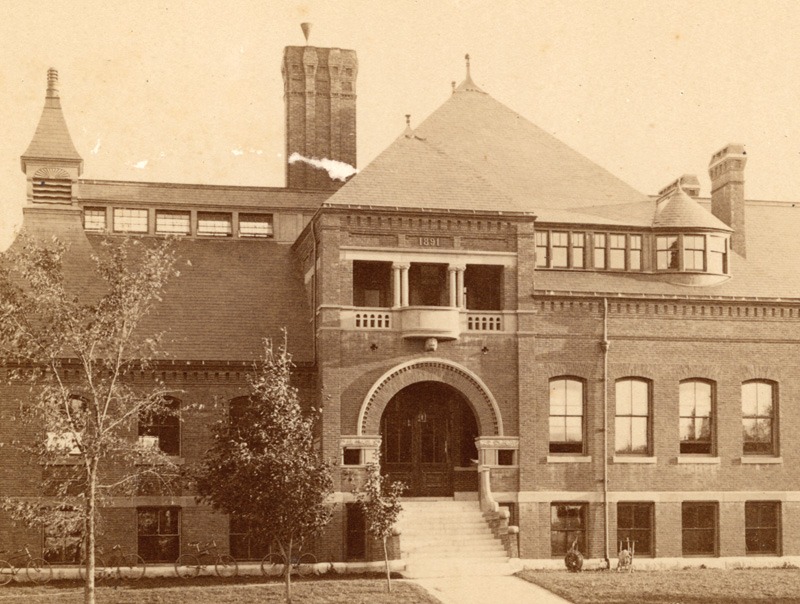
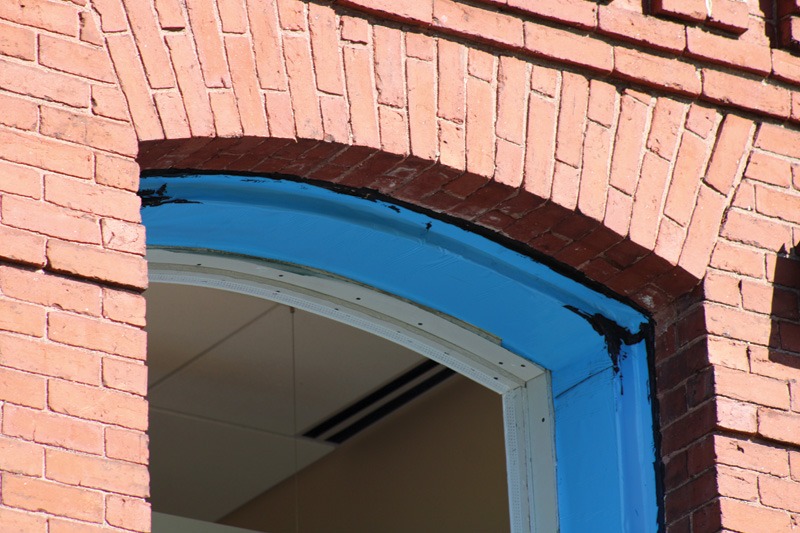
Keep in mind that the building’s current appearance may not reflect its original historical appearance. In one example, the owner provided historic photography from the original construction that revealed the window sashes were originally a darker color, not the lighter color they were painted before replacement. The local preservation commission agreed it would be appropriate to use a darker color so that the replacement windows would look more like the original windows.
At the same time, establish the minimum required U-values, air infiltration, and safety glazing standards under the current code. Many jurisdictions accept a range of compliance strategies, e.g. preserving original windows and improving thermal performance with interior storm sashes, while others may require replacements to meet prescriptive U-values. The design challenge is to reconcile preserved sightlines and muntin geometry with glazing performance. For example, historically narrow frames and sashes are often at odds with deeper, thermally broken modern systems. Document these conflicts early and prepare options to present to the reviewing body.
Owner concerns and objectives
Owners typically prioritize four interrelated concerns: cost, compatibility, operability, and durability/maintenance. Clarify how each will be weighted in the decision-making process:
- Cost—Distinguish upfront capital costs
from life-cycle costs. High-fidelity historic replications or bespoke steel windows will command higher initial investments but may be necessary for landmark approvals. Present alternatives and expected maintenance costs over 10 to 30 years to support budgeting. - Compatibility—Compatibility covers both visual integration and material behavior, i.e. thermal expansion and corrosion resistance. Ensure selected materials and finishes are compatible with adjacent historic fabric to avoid long-term damage. Dissimilar metals such as copper, steel, and aluminum require a bond breaker to prevent galvanic corrosion.
- Operability—Users expect windows to open easily and lock reliably so they can control the natural ventilation of their spaces. Consider adding interior handles for easier operation. Locks should be within reach without the need for a stool or ladder. For hung windows, exterior insect screens are more common, though retractable interior screens connected to the operable sash are often available.
- Durability and maintenance—Low-maintenance exterior finishes, such as resin-based shop-applied coatings on metal, will be more expensive upfront than field-painted wood but will not require as much maintenance over the life of the window.

Refurbish or replace?
The next step is to evaluate whether to refurbish existing units or to replace them. This decision should be based on condition, historical value, performance needs, and lifecycle cost.
Selective refurbishment preserves high-profile units, such as prominent facade windows, while replacing others that are beyond economical repair. Comprehensive replacement may be appropriate when original windows are severely deteriorated, whole-building energy upgrades require uniform performance, or a uniform appearance is required.
Interior storms are an effective, historic-sensitive approach to improve U-values and air tightness without altering the exterior appearance. They are reversible, preserve the original windows, and often meet code and reviewer requirements when exterior changes are restricted.
A lifecycle cost analysis compares initial repair or replacement expenses with projected maintenance, energy savings, and residual values. Careful repair, combined with added weatherstripping and interior storms, yields a favorable cost-to-benefit ratio when the original windows are intact. Conversely, when wood rot, corrosion, or failed glass seals are extensive, replacement may be an economical long-term choice.
Materials, finishes, and glazing types
Material choice impacts aesthetics, performance, durability, and cost. Steel windows replicate the thin profiles and slender sightlines of many industrial or early 20th-century buildings. However, they also require attention to corrosion protection and thermal breaks. Wood windows are often found in many residential and civic buildings. Wood works well with high-quality paint finishes and is easier to repair than steel. Still, it requires regular maintenance because it is susceptible to rot if the outer finish is neglected. Clad systems, primarily constructed of wood but featuring aluminum or composite exterior cladding, combine wood’s general appearance with lower exterior maintenance and increased weather resistance, a good compromise for reduced upkeep.
True divided lites use multiple glazed units separated by full muntins and are historically accurate, though modern replacements often use sealed units with thermal spacers, increasing the depth. The individual panes of glass create slightly different reflections, adding to the overall look and appeal. Conversely, simulated divided lites (SDL) use a full panel of insulated glass and place muntin grids on the exterior and interior glass surfaces. SDLs can also be specified with a spacer bar between panes to closely mimic the look of a true divided lite at a lower cost. Some review commissions permit SDLs if they convincingly replicate proportions and shadow lines, while more stringent commissions may require true divided lites. The surface muntins are available in a variety of widths and profiles, including the traditional ogee profile and the more contemporary square profile. It is essential to confirm available window details and compare them to the existing trim profiles, sill dimensions, drip edges, and head details to maintain historical proportions.
Accessories, including screens, shades, and hardware, should be considered early as they affect the window’s overall aesthetic, functionality, and cost. Screens can be retractable or removable to minimize visibility, while shades and blinds affect occupant comfort and solar gain. Hardware should match the period’s appearance while meeting modern function and security standards.
Implementation: Required approvals from historic commissions
Once goals, materials, and a preservation strategy are agreed upon, the implementation phase converts design intent into approvals, shop drawings, and field execution. Prepare a submittal anticipating questions from the historic commission, including elevations showing proposed changes, material samples, muntin profiles, glazing sections, and photographs of existing conditions. Where replacements deviate from originals for performance reasons, show mockups or precedents and provide a rationale grounded in energy or safety codes. Early engagement with commission staff can streamline approvals and reduce redesign delays.
Engaging manufacturers and installers for detailed support
Select manufacturers and installers with proven experience with similar historic replacement projects. Manufacturer engagement can provide critical technical data, including thermal performance, computer-aided design (CAD) and building information management (BIM) profiles and details, and glazing options. Installers should demonstrate sensitivity to preserving surrounding masonry or trim during removal and to installing flashings, sills, and interfaces that prevent moisture infiltration. Contractually require coordination drawings and outline responsibility for interface elements, e.g. whether the new windows include exterior trim such as head/jamb and sill extensions, or if those will be provided by others and integrated on site.
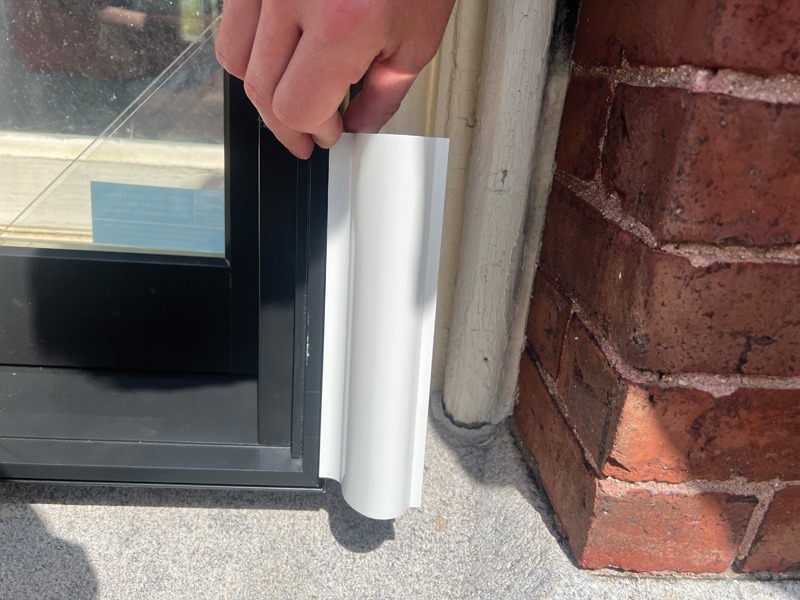
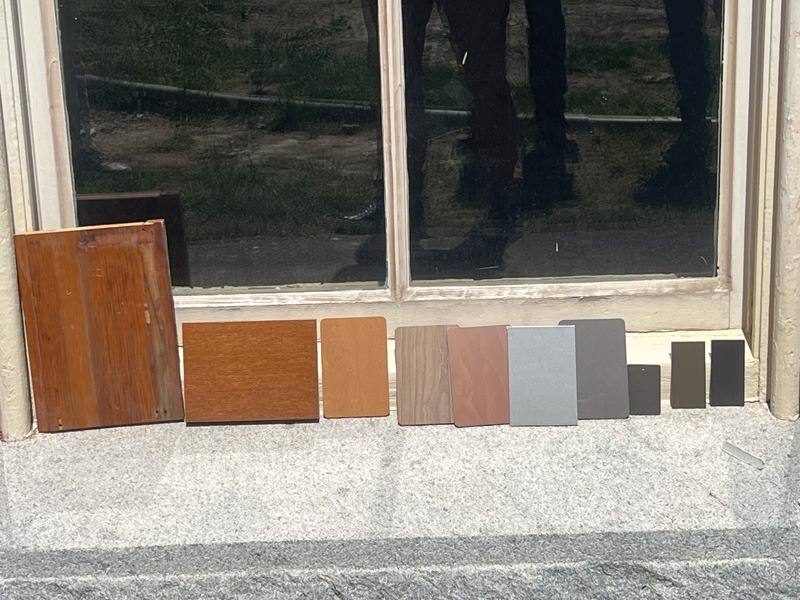
Finish samples and assembly mockups
Finish samples and full-scale assembly mockups are critical. Review actual paint or finish samples on a representative substrate. Field mockups allow stakeholders to evaluate sightlines, reflectivity, muntin shadows, gasketing colors, and the fit of the hardware. Mockups also serve as quality benchmarks for final acceptance and reduce disputes over finish sheen, color matching, and profile dimensions.
Window detailing and existing wall assembly
Once the basis-of-design window, including its essential features, is approved by all parties, the more granular detailing of the windows can begin.
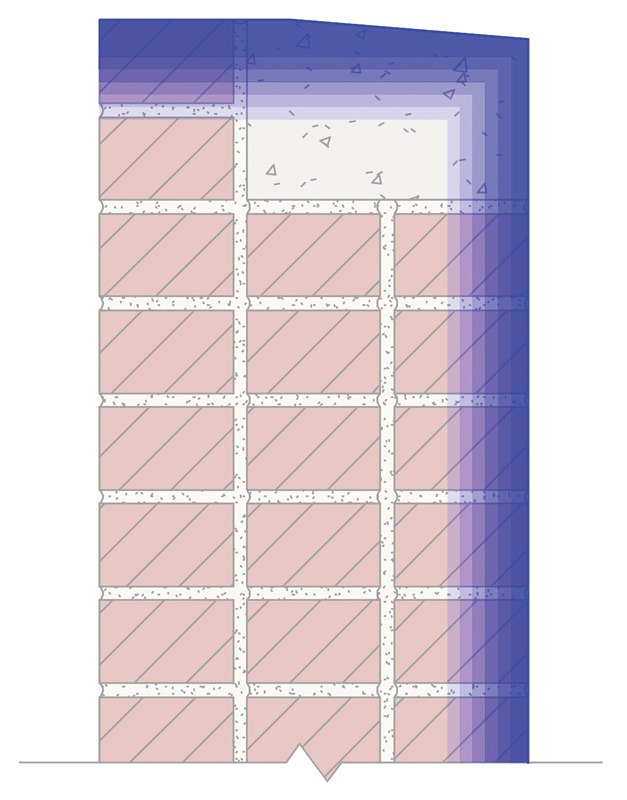
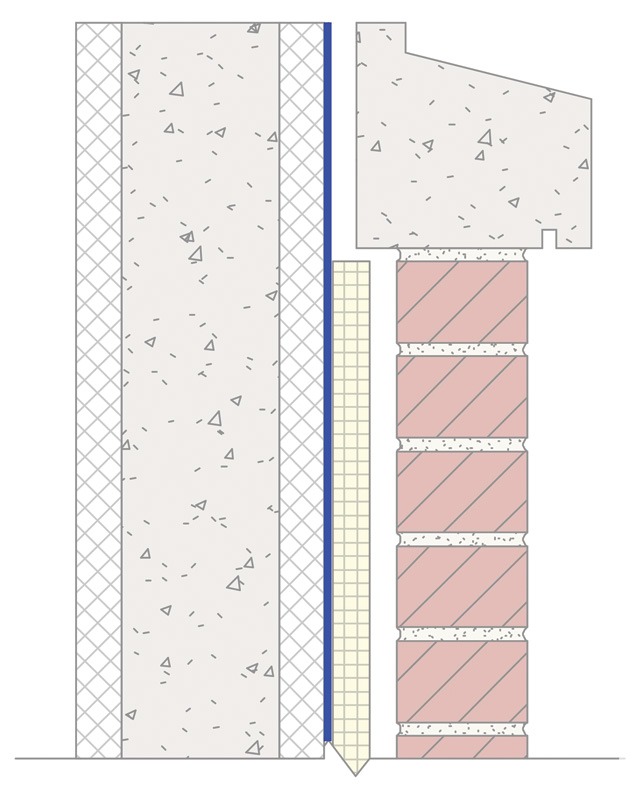
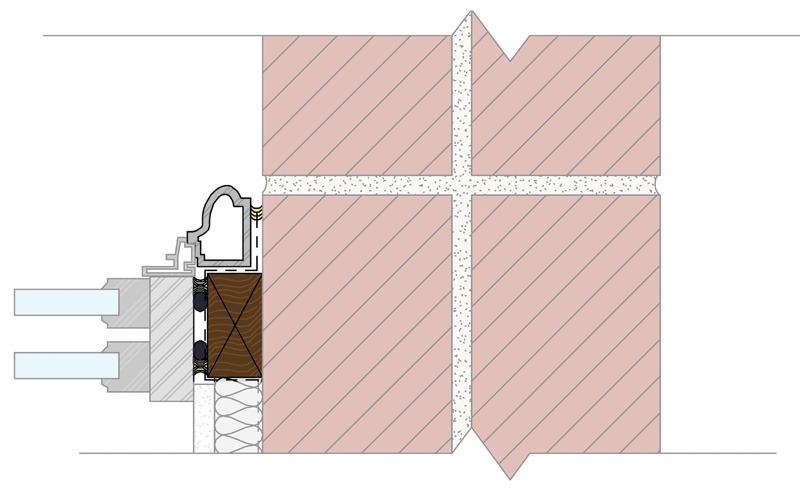
It starts with the rough opening and the adjacent wall assembly. What is the construction of the existing wall? It could be a mass assembly, such as multi-wythe masonry or precast concrete, or a veneer assembly, such as cavity brick or a vinyl rainscreen. This is an important distinction because it determines what part of the wall the window should seal to and anchor to.
In a mass assembly, the air and water barrier is provided by its thickness and layering, as well as the continuity of its joints. This is mostly on the surface, but interior components in a mass wall will contribute to the weatherproofing. In a veneer assembly, there is typically an existing wall membrane that acts as the primary air and water barrier.
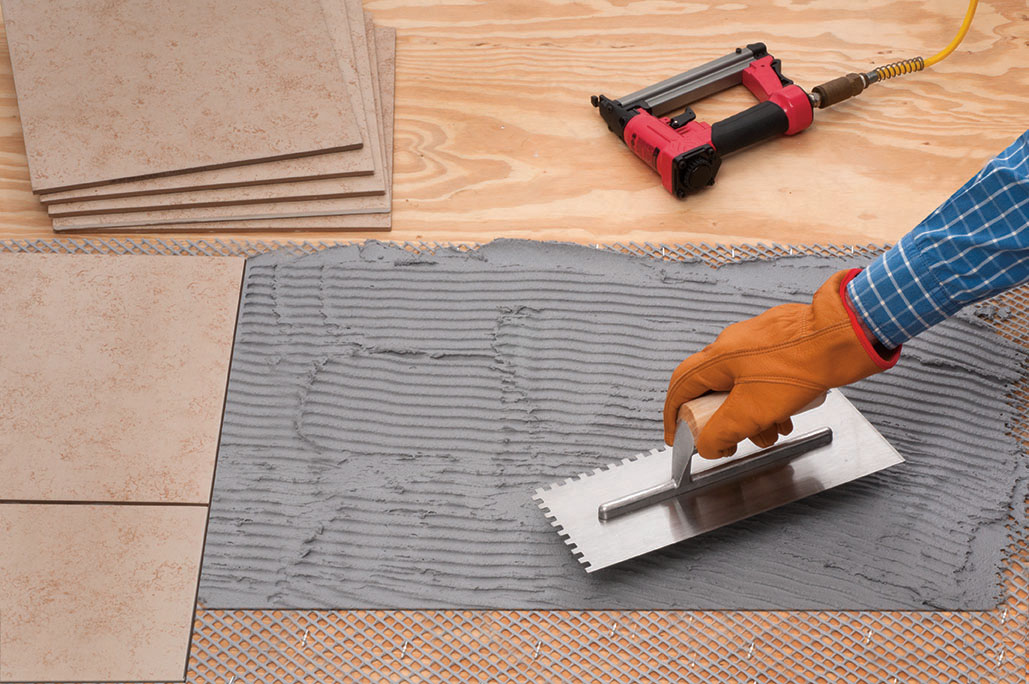
Detailing in wood blocking
In most installations, the rough opening needs to be modified to accommodate the new windows.
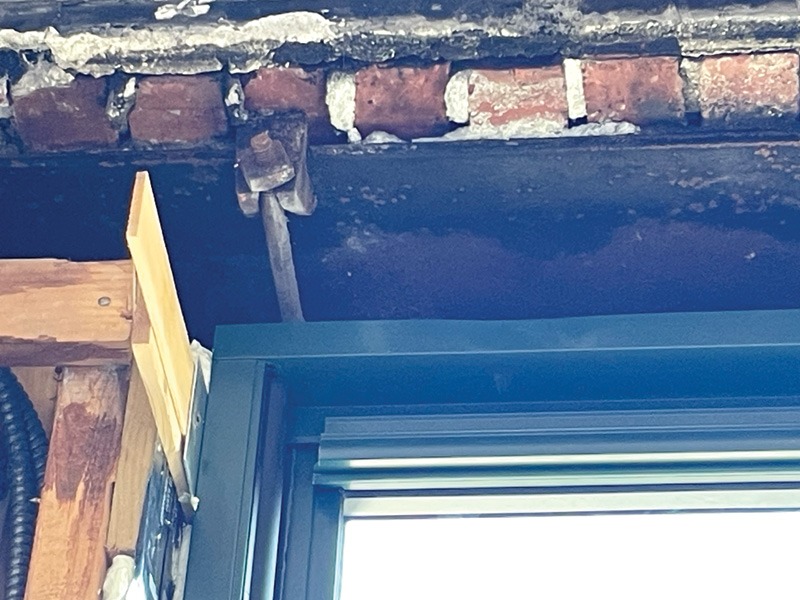
This is usually achieved with wood blocking, such as pressure-treated lumber or plywood. The wood blocking serves multiple purposes. It helps distribute the wind load through the rough opening and provides a hard, flat, continuous substrate to anchor the window. Most existing openings are a grab bag of oddities and obstructions. In one mockup, existing stone anchors at the window head obstructed sealant-joint installation, but removing them was infeasible. This would be an ideal opportunity to add blocking around and over the anchors to smooth out the head.
Window installation is precise work that requires plumb, level, and watertight installations. Glazers should not have to wrestle with the varying construction tolerances of the existing substrate. Use wood blocking to sculpt the desired condition so the glazer can install windows in ideal conditions.
In addition to creating this uniform substrate, blocking can be strategically installed behind the window to provide support for a sill pan.
It is prudent to mock up the window with wood blocking before installing blocking everywhere. Frequently, contractors will hold back the glazers until the mockup is approved, but will greenlight the carpenters before mockup approval.
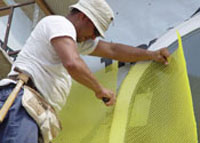
Detailing in membrane flashings
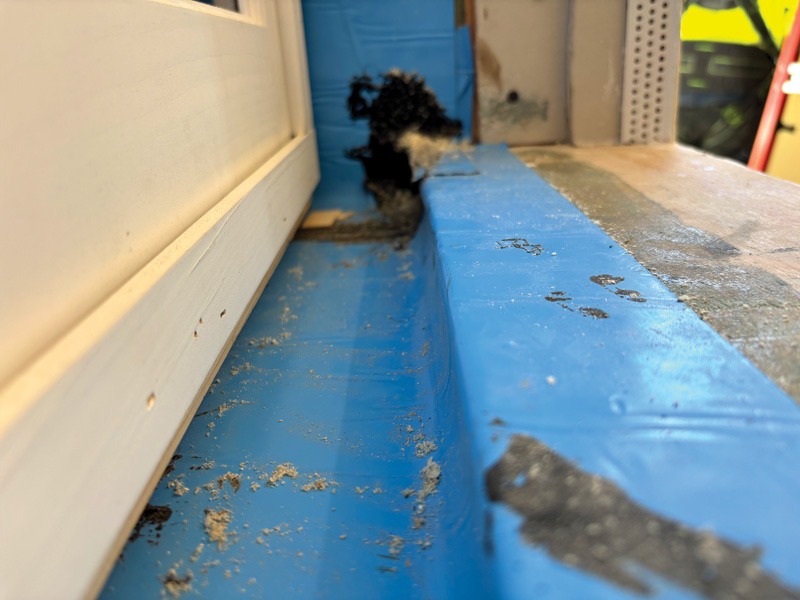
Once the blocking is in position, the membrane flashings can be installed around the rough opening. These membranes can include a variety of sheet-applied and fluid-applied products designed to resist air and water infiltration. Like wood blocking, these also serve multiple purposes. They can form a pan flashing at the sill to collect any infiltrating water and prevent it from reaching the interior. It will protect the wood blocking from moisture and can serve as the bridge between the window and the rough opening’s weather barriers.
For mass assemblies, the membrane flashing should lap onto a significant portion of the mass wall to establish continuity. At veneer assemblies, the membrane flashing should lap onto the existing wall membranes. If there are no existing membranes in the cavity, the membrane flashing can lap onto the backup wall.
For the flashing to be effective, the different pieces must be properly lapped and sealed, especially at the sill-to-jamb and jamb-to-head interface locations. Sequencing drawings can help explain how the pieces should lap.
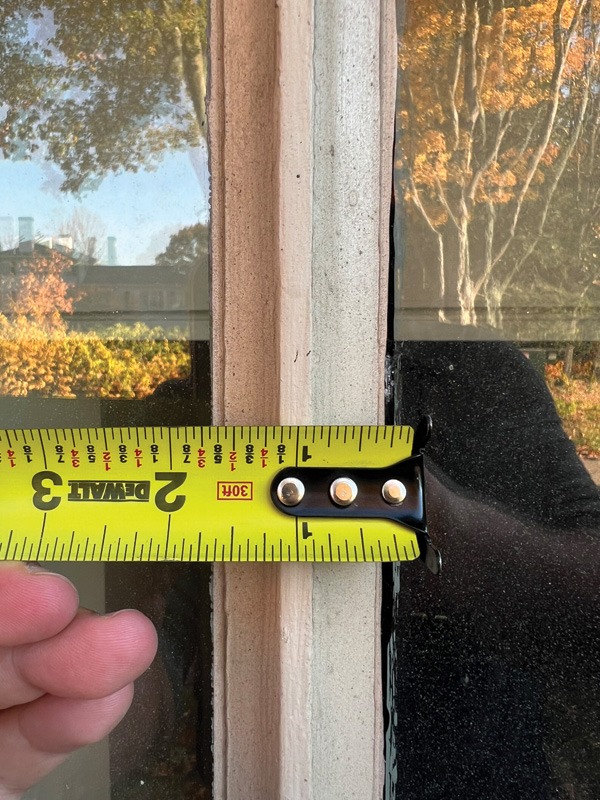
Most window details call for two sealant joints, installed on the outboard and inboard faces of the windows. Since the exterior sealant joint is expected to break down from UV exposure, the interior sealant joint is usually the integral component to air and water barrier continuity, and the exterior sealant joint is considered a sacrificial rainscreen. Designers often go a step further and install weeps in the exterior sealant joint sill. This allows any incidental water leaking through the window, jambs, or head to drain harmlessly.
In collaboration with the air and water barrier continuity, interior and exterior trims need to be considered. One negative to adding blocking is that the potential size of the glass opening is reduced. However, this can be positive if the original window had ornate trims that the project is trying to replicate. The blocking will support the trim piece, and the trim piece will hide the waterproofing seals.
Detailing in window anchorage
The window’s weather seals cannot be designed without coordinating with its anchorage. When attaching the window to the rough opening, fasteners must pierce the membrane flashing or sealant joints. Manufacturers offer multiple attachment methods, and some are easier to waterproof. This is mostly a concern at the sill, which will have to resist potential pooling water.
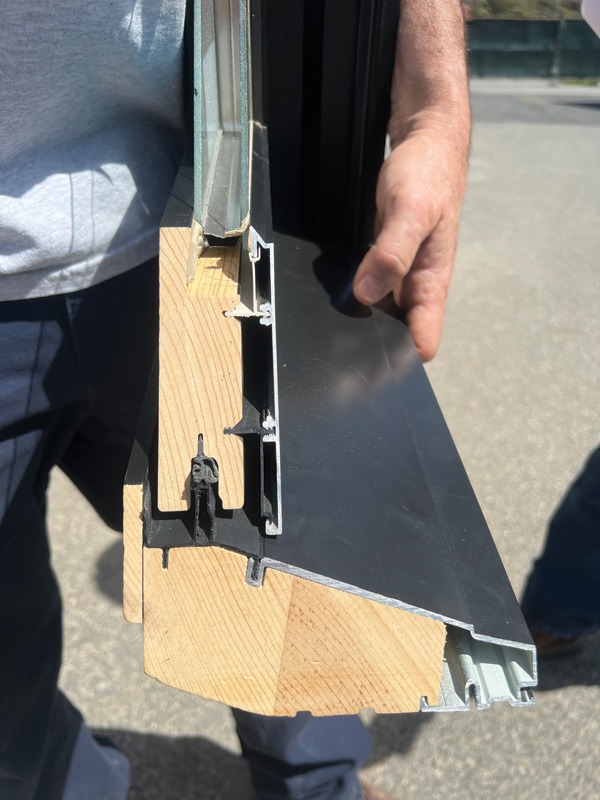
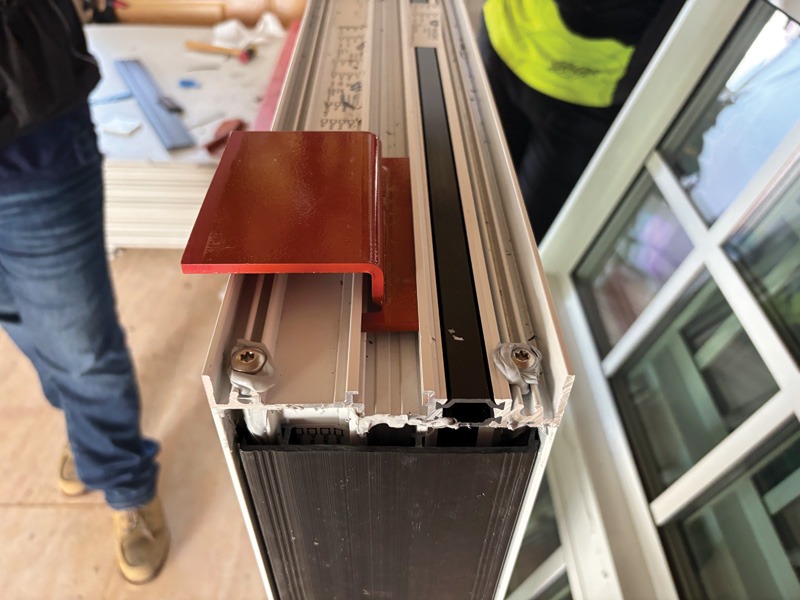
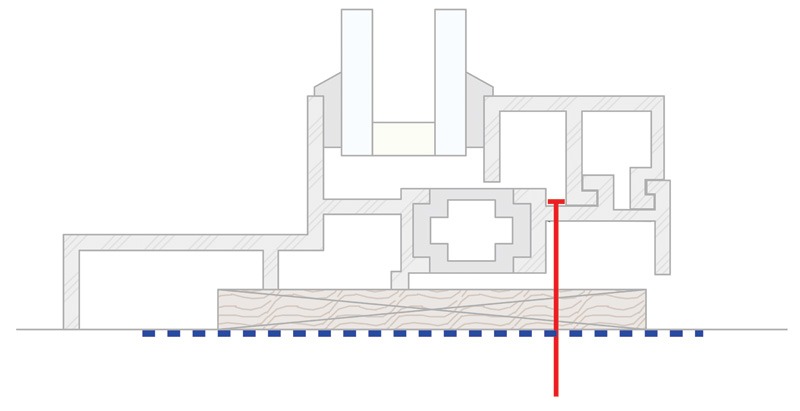
Some manufacturers will even allow installers to omit fasteners at the sill, depending on the unit’s size and wind-load testing. This is the best solution if allowed. These options will vary depending on the window’s style and material, and a typical aluminum sill is shown in the details below:
- Direct attachment—The default anchorage is to drill a fastener straight through the frame into the rough opening. This is not problematic with the head and jambs, but it may be at the sill, where ponding water can occur. The fastener will penetrate the membrane flashing, but the frame will prevent the discontinuity from being sealed.
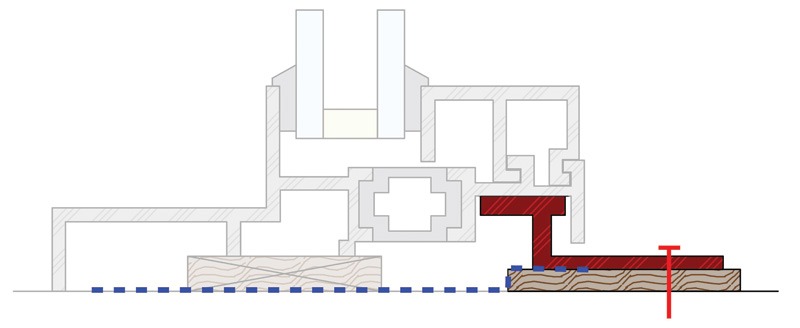
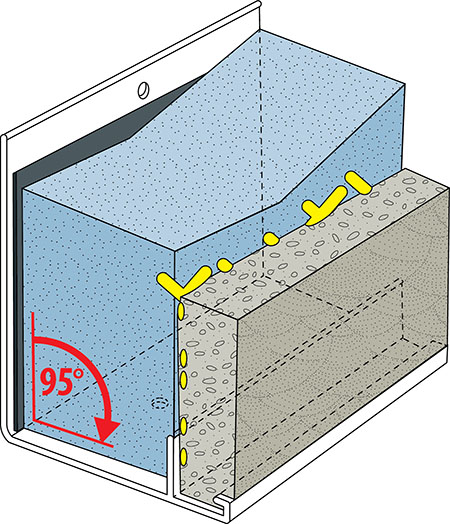
- Strap anchor attachment—Many window manufacturers offer strap anchors as an alternative. Strap anchors are useful as they can be fastened farther inboard, avoiding the need to pierce the membrane flashing. A drawback is that they require interrupting the interior sealant joint. Installers need to pay special attention when detailing around each anchor. At the sill, a strap anchor extends directly back from the bottom of the window. Some strap anchors are rigid, limiting the height of the back dam.
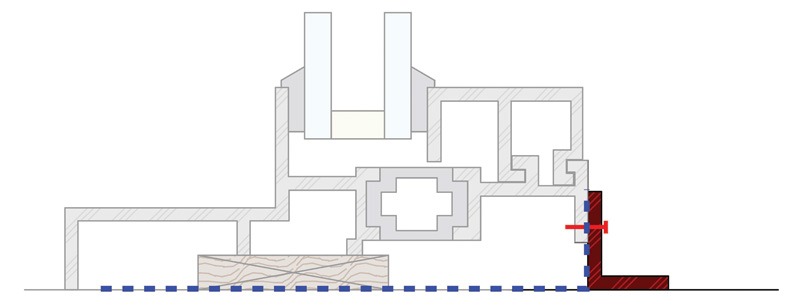
- Angle attachment—If there is an integral back leg at the windowsill, the window can be secured horizontally to a preinstalled angle. This has multiple benefits. The flashing membrane can run up the preinstalled angle to form a back dam. The fasteners from the window to the angle are installed horizontally above any potential standing water. It is far less likely for water to leak through a horizontal fastener than through a vertical one.
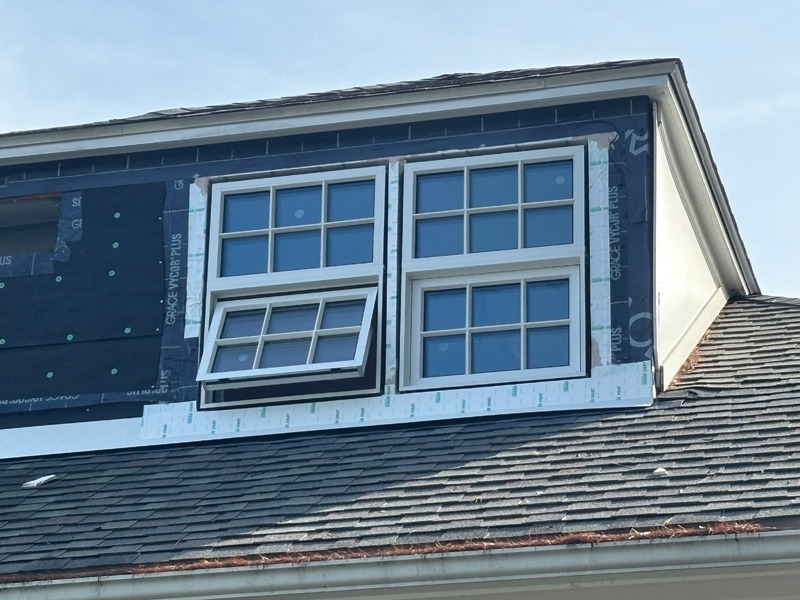
Nail-fin windows are also an option for window anchorage when the window is flush with the rough opening, such as in historical wood-framed buildings.
Acceptance of installation
These details can be discussed and thoroughly vetted through a shop drawing review and performance mockup. Shop drawings should include material specifications, glazing details, thermal break placement, sealants, anchorage, and flashing interfaces.
During installation, conduct periodic progress reviews. Ensure the installers protect adjacent historic fabric; verify rough opening dimensions and square-out conditions; confirm anchorage and shimming tolerances; and perform final performance testing, including air infiltration, water penetration, and operability, as required. Acceptance criteria should be tied to the project’s goals—visual conformance with the approved mockup, performance test pass/fail thresholds, and a documented maintenance and operation manual for the owner.
Conclusion
Whether the project preserves original sashes and augments them with interior storms, or replaces units with historically compatible new windows, the most successful outcomes respect the building’s character, satisfy regulatory and code requirements, and provide owners with a predictable maintenance and performance profile. With early coordination among designers, manufacturers, installers, and reviewers, a solution that meets visual, functional, and financial goals can be found.
The importance of successful window replacement projects is growing as the industry focuses on reusing existing buildings rather than new construction. New windows not only improve the building’s performance but also enhance occupant comfort, encouraging owners to keep their buildings. This allows institutions to preserve their history and culture while addressing the modern performance challenges they face. When done well, a successful window project can shepherd an existing building into the next generation of its use.
Authors

Stephen Holland, P.E., is an enclosure engineer at LeMessurier Consultants Inc. He has experience in the investigation, rehabilitation, and design of a variety of enclosure systems, including roofing, glazing, masonry, cladding, waterproofing, insulation, and below-grade systems. He has specialized in the restoration and retrofitting of enclosure systems in existing and historic buildings.

As associate principal at Annum Architects, Josh Aisenberg, AIA, LEED AP, NCARB, has more than 20 years of experience working with academic clients and institutions on a wide range of project types, including historic building renovations, additions, and new construction.
Key Takeaways
Window replacement in historic buildings requires balancing preservation of original aesthetics with modern thermal and airtightness performance. The process involves evaluating hazardous materials (asbestos/lead), researching landmark requirements, and deciding between refurbishment or replacement. Successful implementation relies on detailed rough opening preparation, including wood blocking and membrane flashings, to ensure continuity of the air and water barriers.
Sign up for our weekly newsletter
Architectural materials and methods delivered right to your inbox
- CSI News & Notes: CSI’s impact earns official recognition; celebrate leaders, mentors, and innovators; and more
- CSI News and Notes: CSI spring certification exams open; scholarships available; and more
- CSI News & Notes: CSI MSR heading to San Diego; spring certification exams open; and more
- To Be Specific: Why CDT Should Be Your First Move
- CSI News & Notes: CSI Fellows share member benefits; and a New Year’s Resolution to keep
Products
Read the Latest Issue